Drawing food isn’t just about replicating what you see; it’s about capturing the essence and appeal of delicious cuisine. Learn to create appetizing food illustrations with tips, techniques, and inspiration from larosafoods.com! Discover drawing tutorials, composition ideas, and ways to realistically portray your favorite culinary creations to elevate your art.
Drawing food offers a unique blend of artistic expression and culinary appreciation, and larosafoods.com is here to help you master the art of drawing food. From mastering basic shapes to creating mouthwatering textures, you’ll discover methods to draw food that truly looks delicious. Unleash your inner food artist and explore the endless possibilities of food illustration with us!
1. Why Draw Food? Exploring the Benefits and Drawbacks
Drawing food is a fun and rewarding artistic endeavor, but it also has its challenges. Let’s explore some of the advantages and disadvantages of focusing on food as your subject matter.
1.1. Advantages of Drawing Food
Drawing food comes with a unique set of advantages that make it a popular and fulfilling subject for artists of all levels. What makes food such a great subject to draw?
- Still Life Staple: Food is a classic element in still life drawing, allowing you to experiment with interesting compositions and arrangements. You can easily create visually appealing setups with various foods and objects.
- Cooperative Subject: When drawing food from life, it stays perfectly still, giving you ample time to observe and sketch without movement. This is especially helpful for beginners learning to capture details accurately.
- Abundant Choices: The possibilities are endless, from fruits and vegetables to elaborate dishes. Your kitchen, garden, local grocery store, or farmer’s market are all excellent sources of inspiration.
- Convenient References: If you prefer using reference photos, building a collection is easy with foods you already have. You can take pictures of your meals or snacks and use them as references later.
- Motivation for Sketching: Drawing your favorite foods can motivate you to develop a daily sketching habit. Sketching a food item a day and then enjoying it as a reward is a fun way to stay consistent.
- Develop Observation Skills: Drawing food requires close observation of shapes, textures, colors, and light, enhancing your overall artistic skills. According to a study by the University of California, Berkeley, in June 2023, consistent practice in observational drawing enhances cognitive abilities related to visual perception and attention to detail.
- Creative Exploration: Food offers a variety of shapes, colors, and textures, providing endless opportunities for creative exploration and experimentation with different drawing techniques. Drawing food allows you to play with light and shadow, color blending, and texture representation.
1.2. Disadvantages of Drawing Food
While drawing food offers many benefits, there are also a few potential drawbacks to consider when choosing it as your subject matter. What are some challenges to keep in mind?
- Unsuitable for Eating: Some foods, like hot or juicy items, may not be ideal for drawing from life if you plan to eat them afterward. The food can get cold or soggy, making it less appealing.
- Realistic Appeal Challenge: Realistically drawing food while maintaining its appetizing appearance can be challenging. It requires careful attention to detail to capture the textures, colors, and shapes that make food look delicious.
- Time Sensitivity: Certain foods, such as ice cream or melting cheese, change quickly, requiring you to work fast or use reference photos. The melting process can alter the food’s appearance, making it difficult to draw accurately over time.
- Potential Distractions: The aroma of the food can be distracting, especially if you are hungry. It might be tempting to take a bite while you are drawing, which can disrupt your focus and concentration.
- Complexity of Textures: Some foods have complex textures that are difficult to replicate accurately with drawing materials. For example, capturing the intricate patterns of a croissant or the bumpy surface of a raspberry requires advanced skills.
- Color Accuracy: Achieving accurate colors in your food drawings can be challenging, especially when working with a limited palette. You may need to mix colors carefully to match the hues and shades of the food.
- Preserving Freshness: Drawing fresh produce from life can be challenging because fruits and vegetables may wilt or discolor over time. This requires you to work quickly or take reference photos to capture the food’s appearance while it is still fresh.
2. What Foods Should You Draw? Finding Inspiration in the Kitchen
Choosing the right subject matter is key to a successful and enjoyable drawing experience. What kind of foods should you consider drawing?
2.1. Drawing from Your Pantry
Starting with foods you already have at home is an excellent approach. You’ll have easy access to your subjects and can practice drawing them whenever you have free time.
- Personal Favorites: Drawing your favorite foods can be a great motivator. You’re likely to be more enthusiastic about a subject you enjoy, making the drawing process more rewarding.
- Still Life Arrangements: For still life compositions, choose foods that create a pleasing visual arrangement. Experiment with different positions and lighting options to find the most appealing setup. The foods don’t necessarily have to be your favorites; focus on how they look together.
- Variety of Textures: Opt for foods with different textures to add depth and interest to your drawing. Combine smooth fruits with rough vegetables or crunchy snacks for a diverse visual experience.
 assorted fruits still life drawing reference
2.2. Exploring Restaurant Menus
Restaurant menus are treasure troves of inspiration for food drawings. How can menus spark your creativity?
- Delicious Descriptions: Scan menus for appetizers, entrees, and desserts that catch your eye. Pay attention to the descriptive adjectives that make the food sound appealing.
- Imagination Exercise: If the menu lacks pictures, imagine you’re an illustrator tasked with creating a mouthwatering drawing of the food. Visualize the details and textures that would entice customers.
- Reference Material: If the menu includes pictures, use them as additional inspiration. Analyze the composition, lighting, and colors to inform your drawings.
2.3. Aligning with Your Goals
Ultimately, the foods you choose to draw should align with your current goals and sources of inspiration. How can you ensure your choices are meaningful?
- Experiment with Unfamiliar Foods: Don’t hesitate to draw foods you’re not familiar with or even dislike. This can challenge you to explore new shapes, textures, and colors, broadening your artistic horizons.
- Focus on Skill Development: If your goal is to improve your drawing skills, choose foods that offer opportunities to practice specific techniques, such as shading, blending, or rendering textures.
- Seek Appreciation: If you want your drawings to be appreciated by others, consider drawing foods that are visually appealing and recognizable. Popular dishes, colorful fruits, or decadent desserts are often well-received.
- Reflect Personal Interests: Choose foods that reflect your personal interests and cultural background. This can add a personal touch to your drawings and make the process more meaningful.
3. Essential Tips for Drawing Food: Achieving Realistic and Appetizing Results
Now that you know what to draw, let’s dive into how to draw food effectively. What are some key techniques to keep in mind?
3.1. Breaking Down Shapes
Start by simplifying the food into basic geometric shapes to establish the outline. How can you use this technique effectively?
- Geometric Foundation: Visualize the food as a combination of smaller shapes like circles, squares, triangles, and cylinders. This helps you create a simplified framework for your drawing.
- Pizza Example: When drawing a pizza from above, start with a circle. Divide it into slices using vertical, horizontal, and diagonal lines. If viewing the pizza at an angle, use an oval instead of a circle to account for foreshortening.
- Foreshortening Awareness: Be mindful of foreshortening when drawing food at an angle. The parts closer to the viewer will appear larger than those farther away.
3.2. Mastering Values and Textures
Enhance your food drawings with shading and texture to create a three-dimensional effect. How can you add depth and realism?
- Shading Techniques: Use a mix of light and dark values to transform your food outline into a more realistic form. Observe how light interacts with the food and create corresponding shadows and highlights.
- Texture Replication: Pay close attention to the surface details of the food, such as bumps, ridges, or cracks. Replicate these textures in your drawing to add another layer of realism.
- Value Scales: Create a value scale to practice different levels of shading. Use pencils or charcoal to create smooth transitions from light to dark.
- Blending Techniques: Experiment with blending techniques, such as smudging or using blending stumps, to create soft transitions between values.
- Hatching and Cross-Hatching: Use hatching (parallel lines) or cross-hatching (intersecting lines) to build up values and create texture. Vary the spacing and density of the lines to create different effects.
3.3. Creating Compositions
Don’t limit yourself to drawing a single food item. Compose your drawings with other foods or objects to tell a more compelling story. How can you create interesting compositions?
- Complementary Foods: Pair your main food item with other foods that commonly accompany it. For example, draw fries next to a hamburger or a glass of milk with cookies.
- Everyday Objects: Include common objects that surround the food in our daily lives, such as plates, utensils, tables, tablecloths, or salt and pepper shakers.
- Rule of Thirds: Apply the rule of thirds to create balanced compositions. Divide your drawing area into a 3×3 grid and place key elements along the lines or at their intersections.
- Leading Lines: Use leading lines to guide the viewer’s eye through the composition. These can be created by the arrangement of objects or by the direction of light and shadow.
- Overlapping Elements: Overlap elements to create depth and visual interest. This can be achieved by placing one object in front of another or by partially obscuring elements.
4. Drawing Food From Life: A Sensory Experience
Drawing food from life offers a unique and engaging way to connect with your subject matter, appealing to multiple senses. What are the best practices for this approach?
4.1. Setting Up Your Still Life
Creating an appealing still life arrangement is essential for drawing food from life. Here’s how to set up a visually pleasing composition:
- Choose Fresh, Appealing Foods: Select foods that are visually appealing and in good condition. Fresh fruits, vegetables, and well-presented dishes are ideal.
- Consider Lighting: Natural light is often best, but be mindful of how it changes throughout the day. Position your setup near a window or use artificial lighting to create interesting shadows and highlights.
- Arrange Thoughtfully: Experiment with different arrangements to find the most visually pleasing composition. Consider the rule of thirds, balance, and focal points.
- Add Props: Incorporate relevant props, such as plates, utensils, tablecloths, and napkins, to add context and visual interest.
- Keep It Simple: Don’t overcrowd your setup. A few well-chosen items are often more effective than a cluttered arrangement.
4.2. Observing Details
Drawing food from life requires careful observation of details. What should you focus on?
- Shapes and Forms: Start by identifying the basic shapes and forms of the food items. Look for underlying geometric structures to help you create accurate outlines.
- Colors and Values: Pay close attention to the colors and values of the food. Notice subtle variations in hue, saturation, and brightness.
- Textures: Observe the textures of the food, such as smooth, rough, bumpy, or glossy. Try to capture these textures in your drawing using appropriate techniques.
- Light and Shadow: Study how light interacts with the food, creating highlights and shadows. Use shading to create a sense of depth and volume.
- Imperfections: Don’t be afraid to include imperfections in your drawing. These can add character and realism to your work.
4.3. Preserving Freshness
When drawing food from life, it’s important to preserve its freshness as much as possible. How can you prevent spoilage?
- Work Quickly: Some foods, such as cut fruits and vegetables, can deteriorate quickly. Work as efficiently as possible to capture their appearance while they are still fresh.
- Refrigerate When Possible: If you’re drawing foods that need to be kept cold, such as dairy products or seafood, keep them refrigerated until you’re ready to draw them.
- Use a Spray Bottle: Lightly mist fruits and vegetables with water to keep them from drying out.
- Take Breaks: If you’re working on a large or complex drawing, take breaks to allow the food to stay fresh. Store the food in the refrigerator or cover it with a damp cloth during breaks.
- Photograph Your Setup: Take photos of your setup before you start drawing. This will allow you to refer to the original appearance of the food if it starts to deteriorate.
5. Digital Food Illustration: Embracing Technology
Digital illustration offers a versatile and convenient way to create food drawings. What are the advantages of this approach?
5.1. Choosing the Right Tools
Selecting the right digital tools is crucial for creating effective food illustrations. What should you consider?
- Drawing Tablet: Invest in a high-quality drawing tablet with pressure sensitivity for creating varied line weights and shading effects. Wacom and Huion are popular brands.
- Stylus: Choose a stylus that feels comfortable in your hand and offers good precision. Some styluses have tilt sensitivity for creating different brush strokes.
- Illustration Software: Select illustration software that meets your needs and skill level. Adobe Photoshop, Adobe Illustrator, Procreate, and Corel Painter are popular options.
- Brushes: Experiment with different brushes to create various textures and effects. Many software programs offer a wide range of brushes, and you can also download or create custom brushes.
- Color Palettes: Use color palettes to help you choose harmonious colors for your food illustrations. Adobe Color and Coolors are useful tools for creating and exploring color palettes.
5.2. Mastering Digital Techniques
Creating realistic food illustrations digitally requires mastering several techniques. What are some key skills to develop?
- Layering: Use layers to build up your illustration gradually. This allows you to make changes without affecting other parts of the drawing.
- Blending: Use blending tools to create smooth transitions between colors and values. This helps to create a sense of depth and realism.
- Masking: Use masking techniques to protect certain areas of your drawing while you work on others. This is useful for creating complex shapes and textures.
- Texture Overlays: Use texture overlays to add realistic textures to your food illustrations. You can find texture overlays online or create your own by scanning or photographing real textures.
- Color Correction: Use color correction tools to adjust the colors in your illustration. This can help you to create a more realistic or stylized look.
5.3. Referencing Photos
While drawing from life is ideal, using reference photos can be helpful for digital food illustration. What are the best practices for referencing photos?
- Use High-Quality Photos: Start with high-quality photos that are well-lit and in focus. This will make it easier to see the details of the food.
- Observe Lighting: Pay attention to the lighting in your reference photos. Notice how light interacts with the food, creating highlights and shadows.
- Analyze Colors: Analyze the colors in your reference photos. Look for subtle variations in hue, saturation, and brightness.
- Don’t Trace Directly: While it can be tempting to trace directly from a reference photo, this can result in a flat and lifeless drawing. Instead, use the photo as a guide and try to capture the essence of the food in your own style.
- Experiment with Styles: Digital illustration allows you to experiment with different styles and techniques. Try creating realistic, stylized, or cartoonish food illustrations.
6. Enhancing Your Food Drawings: Adding Context and Storytelling
Beyond technical skills, adding context and storytelling elements can elevate your food drawings. How can you make your illustrations more engaging?
6.1. Incorporating Backgrounds
Adding backgrounds to your food drawings can create a sense of place and context. What types of backgrounds work well?
- Simple Table Settings: A simple table setting with a tablecloth, plate, and utensils can create a realistic and inviting scene.
- Kitchen Scenes: Depicting a kitchen scene with countertops, cabinets, and appliances can add a sense of warmth and domesticity.
- Outdoor Settings: Outdoor settings, such as a picnic in a park or a meal on a patio, can create a sense of freshness and naturalness.
- Abstract Backgrounds: Abstract backgrounds with colors, shapes, and textures can add visual interest and create a sense of mood or emotion.
- Minimalist Backgrounds: Minimalist backgrounds with a simple color gradient or a few geometric shapes can keep the focus on the food while adding a touch of style.
6.2. Telling a Story
Using your food drawings to tell a story can make them more meaningful and engaging. What stories can you convey?
- Cultural Traditions: Depict traditional dishes and cooking practices from different cultures to celebrate diversity and heritage.
- Personal Memories: Draw foods that evoke personal memories and emotions, such as a favorite childhood meal or a special occasion dish.
- Seasonal Themes: Create drawings that reflect the changing seasons, such as a summer picnic with watermelon and lemonade or a winter feast with roasted turkey and pumpkin pie.
- Health and Wellness: Draw healthy and nutritious foods to promote wellness and inspire healthy eating habits.
- Fantasy and Imagination: Let your imagination run wild and create fantastical food scenes with whimsical characters and surreal elements.
6.3. Adding Hand-Lettering
Combining food drawings with hand-lettering can add a personal touch and convey additional information. What types of lettering can you use?
- Recipe Titles: Add the title of a recipe to your drawing to create a visually appealing and informative piece.
- Ingredients Lists: Include a list of ingredients alongside your drawing to provide a practical guide for cooking.
- Quotes and Proverbs: Add quotes or proverbs about food to convey wisdom and cultural insights.
- Descriptive Words: Use descriptive words to highlight the flavors, textures, and aromas of the food.
- Personal Notes: Add personal notes or annotations to your drawing to share your thoughts and experiences.
7. Resources for Improving Your Food Drawing Skills
To improve your food drawing skills, consider exploring various resources that offer guidance, inspiration, and learning opportunities. What resources are available?
7.1. Online Tutorials
Numerous online tutorials can help you learn the basics of food drawing and develop advanced techniques. Which tutorials are most helpful?
- YouTube Channels: Channels like “Proko,” “Draw with Jazza,” and “SchaeferArt” offer free tutorials on various drawing topics, including food illustration.
- Skillshare: Skillshare offers a wide range of online courses on drawing and illustration, including courses specifically focused on food drawing.
- Domestika: Domestika provides high-quality online courses taught by professional illustrators and artists, covering various aspects of food illustration.
- CreativeLive: CreativeLive offers live and on-demand workshops on drawing, illustration, and other creative topics.
- Blogs and Websites: Websites like “EmptyEasel,” “Drawing Tutorials 101,” and “LetsDrawToday.com” offer free tutorials and articles on drawing techniques and tips.
7.2. Books
Several books can provide in-depth knowledge and practical guidance on food drawing. Which books are recommended?
- “Drawing on the Right Side of the Brain” by Betty Edwards: This classic book teaches you how to draw realistically by tapping into your brain’s visual processing abilities.
- “Keys to Drawing” by Bert Dodson: This book provides a comprehensive guide to drawing techniques, covering topics such as line, value, texture, and composition.
- “The Natural Way to Draw” by Kimon Nicolaïdes: This book offers a unique approach to drawing, emphasizing observation, gesture, and movement.
- “Drawing for the Absolute Beginner” by Mark Willenbrink and Mary Willenbrink: This book provides a step-by-step guide to drawing for beginners, covering basic techniques and concepts.
- “Figure Drawing: For All It’s Worth” by Andrew Loomis: Although focused on figure drawing, this book provides valuable insights into anatomy, proportion, and form, which can be applied to food drawing as well.
7.3. Communities and Workshops
Joining a community or attending a workshop can provide valuable feedback, support, and inspiration for your food drawings. How can you get involved?
- Online Forums: Online forums like “Reddit’s r/drawing” and “WetCanvas” offer a space for artists to share their work, ask questions, and receive feedback.
- Local Art Groups: Local art groups often organize workshops, exhibitions, and other events that provide opportunities to connect with other artists and learn from experienced instructors.
- Art Classes: Art classes at community centers, colleges, or private studios can provide structured instruction and personalized feedback on your food drawings.
- Social Media Groups: Social media groups on platforms like Facebook and Instagram offer a way to connect with other food artists, share your work, and participate in challenges and collaborations.
- Art Retreats: Art retreats provide an immersive learning experience in a supportive and inspiring environment.
8. Frequently Asked Questions (FAQ) About How to Draw Food
Here are some frequently asked questions about drawing food to help you get started and improve your skills:
8.1. What are the best materials for drawing food?
The best materials depend on your preferred drawing style and medium. Pencils, colored pencils, charcoal, markers, and watercolors are all popular choices. Digital artists often use drawing tablets and illustration software.
8.2. How do I make my food drawings look realistic?
Focus on accurate shapes, values, and textures. Pay attention to lighting and shadows to create depth and dimension. Use high-quality reference photos and observe the details closely.
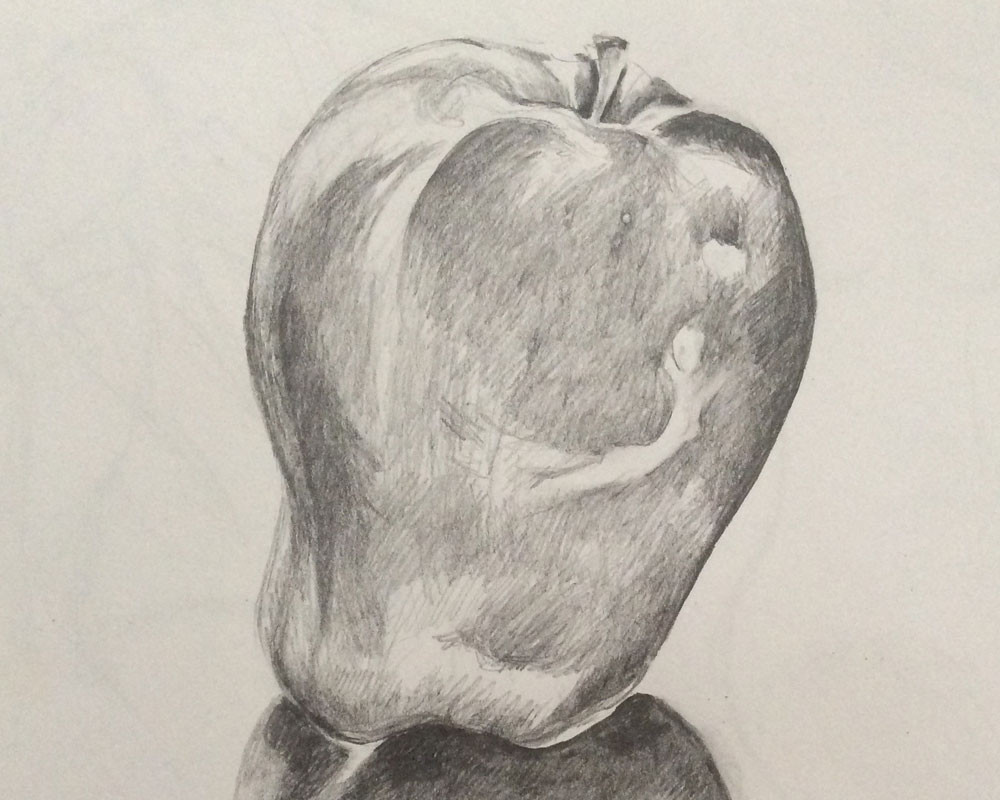
8.3. What are some easy foods to draw for beginners?
Simple fruits and vegetables like apples, bananas, oranges, and carrots are great starting points. These foods have basic shapes and textures that are easy to capture.
8.4. How do I draw shiny or glossy foods?
Use highlights and reflections to create the illusion of shine. Observe how light interacts with the surface and create corresponding bright spots and subtle gradients.
8.5. How do I draw realistic textures like bread or cheese?
Use a variety of drawing techniques to replicate different textures. Stippling, hatching, and cross-hatching can be used to create rough textures, while smooth blending can be used to create soft textures.
8.6. How do I add color to my food drawings?
Experiment with colored pencils, markers, watercolors, or digital painting techniques. Use color palettes to create harmonious color schemes and pay attention to color values and saturation.
8.7. How do I create interesting compositions with food?
Use the rule of thirds, leading lines, and overlapping elements to create balanced and dynamic compositions. Add props and backgrounds to create a sense of context and storytelling.
8.8. How do I avoid making my food drawings look flat?
Use shading and highlights to create depth and dimension. Pay attention to the form and structure of the food and use perspective to create a sense of space.
8.9. What are some common mistakes to avoid when drawing food?
Avoid drawing outlines without considering the form of the food. Don’t use flat colors without shading and highlights. Don’t ignore the textures and details that make food look realistic.
8.10. How can I improve my food drawing skills quickly?
Practice regularly, study the work of other food artists, and seek feedback from experienced instructors. Experiment with different techniques and materials and don’t be afraid to make mistakes.
9. Start Drawing Today: Unleash Your Culinary Creativity with larosafoods.com
Drawing food is a delightful way to blend artistic expression with your love for cuisine. What are you waiting for?
Ready to bring your culinary creations to life on paper? Visit larosafoods.com for a wealth of inspiration, recipes, and drawing tips to fuel your artistic journey. Explore our diverse collection of recipes, master essential cooking techniques, and discover the endless possibilities of food illustration. Whether you’re a seasoned artist or just starting out, larosafoods.com is your ultimate resource for all things food and art. Let’s create something delicious together!
Address: 1 S Park St, San Francisco, CA 94107, United States
Phone: +1 (415) 987-0123
Website: larosafoods.com
Enjoyed learning about drawing food? Check out our other articles on larosafoods.com for more culinary inspiration:
- How to Draw a Peeled Banana
- How to Draw a Hamburger with a Tempting Look
- How to Draw a Pumpkin Realistically with Easy Steps