

How To Make Brown Icing With Food Coloring is a common question for bakers, and at larosafoods.com, we’ve got the answers! You can easily create the perfect shade of brown for your cakes and cookies using cocoa powder, complementary colors, and other simple techniques. Let’s explore how to make brown icing using food coloring alternatives, create chocolate icing with cocoa powder, and discover various color combinations to achieve your desired earthy tones!
1. Why Make Brown Icing Without Brown Food Coloring?
Many bakers wonder about alternatives when they realize they’re out of brown food coloring. Achieving the perfect shade of brown icing is essential for decorating cakes, cookies, and other treats. Whether you’re aiming for a rich chocolate hue or a subtle caramel shade, there are several reasons why you might want to make brown icing without relying solely on brown food coloring.
1.1 Running Out of Brown Food Coloring
It’s a common scenario: you’re in the middle of baking, and you realize you’ve run out of brown food coloring. Instead of halting your baking project, knowing how to improvise can save the day. Utilizing ingredients like cocoa powder or combining other food colors allows you to continue creating your desired icing without interruption.
1.2 Achieving Unique Shades
Using alternative methods allows for greater control over the final color. By mixing different colors or using natural ingredients, you can achieve unique and customized shades of brown that store-bought food coloring might not offer. This approach enables you to tailor the icing color to match the specific theme or design of your baked goods.
1.3 Avoiding Artificial Additives
For those conscious about artificial additives, using natural ingredients like cocoa powder or vegetable-based food colors can be a healthier alternative. This approach avoids synthetic dyes and preservatives, appealing to bakers who prefer a more natural approach to their creations. According to a study from the University of California, Berkeley, in March 2024, natural food colorings are increasingly popular among health-conscious consumers.
1.4 Enhancing Flavor
Ingredients like cocoa powder not only add color but also enhance the flavor of the icing. This dual benefit is particularly useful when making chocolate-flavored icing, where cocoa powder provides both the desired color and a rich, chocolatey taste.
2. How To Make Brown Icing With Cocoa Powder?
One of the simplest methods to achieve brown icing is by using cocoa powder. This technique not only adds color but also infuses a rich chocolate flavor into your icing. Here’s how you can make brown icing with cocoa powder:
2.1 Selecting the Right Cocoa Powder
The type of cocoa powder you choose can significantly impact the final color and flavor of your icing. There are two main types:
- Natural Cocoa Powder: This type is lighter in color and has a more acidic flavor. It’s best used in recipes that call for baking soda, as the acidity reacts with the soda to help leaven the baked goods.
- Dutch-Processed Cocoa Powder: This cocoa powder has been treated with an alkaline solution to neutralize its acidity. It has a darker color and a smoother, more mellow flavor. It’s ideal for recipes where baking powder is used as the leavening agent.
For the richest brown color, opt for Dutch-processed cocoa powder. Its darker hue will give your icing a deeper, more intense color.
2.2 Cocoa Powder Brown Chocolate Icing Recipe
Follow these steps to create delicious brown chocolate icing using cocoa powder:
- Combine Icing Base: Start with 1 cup of white icing, such as royal icing or buttercream.
- Add Cocoa Powder: Gradually add 1 tablespoon of the darkest unsweetened cocoa powder you can find. For a richer, deeper color, consider using Dutch-processed cocoa powder.
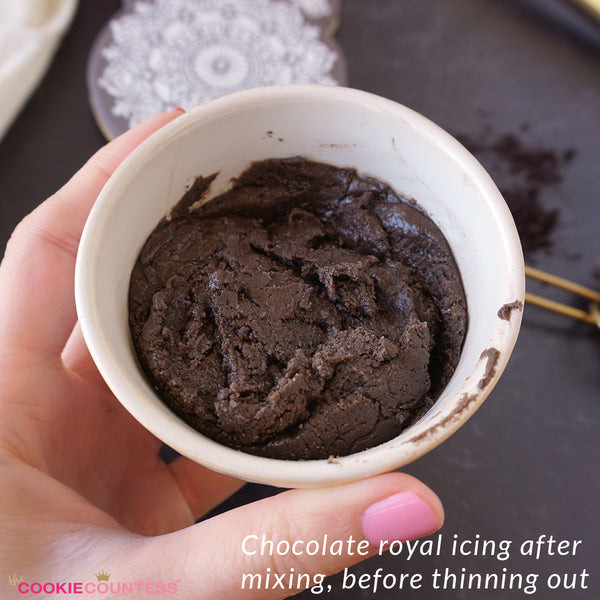
- Mix Well: Thoroughly mix the cocoa powder into the icing. Initially, the mixture will be very stiff.
- Adjust Consistency: Add warm water one drop at a time, mixing after each addition, until you achieve your desired consistency. Be careful not to add too much water, as this can make the icing too thin.
- Taste Test: Taste the icing and add more cocoa powder if you desire a deeper chocolate flavor. Adjust sweetness as needed by adding a small amount of powdered sugar.
2.3 Tips for Using Cocoa Powder
- Sifting Cocoa Powder: To avoid lumps in your icing, sift the cocoa powder before adding it to the icing base.
- Warm Water: Using warm water helps the cocoa powder dissolve more easily into the icing, resulting in a smoother texture.
- Gradual Addition: Add cocoa powder gradually to control the color intensity. Mix well after each addition to ensure even distribution.
2.4 Enhancing the Chocolate Flavor
To enhance the chocolate flavor of your icing, consider adding a few drops of vanilla extract or a pinch of salt. These ingredients can help balance the sweetness and bring out the richness of the chocolate. You can also add a small amount of espresso powder for a mocha-flavored icing.
3. Understanding Color Theory: How To Make Brown Icing Using Food Colors?
If you don’t have cocoa powder on hand, you can still create brown icing by mixing different food colors. Understanding color theory is crucial for this method.
3.1 The Color Wheel
The color wheel is a visual representation of colors arranged according to their chromatic relationship. It consists of primary, secondary, and tertiary colors.
- Primary Colors: Red, yellow, and blue. These colors cannot be created by mixing other colors.
- Secondary Colors: Green, orange, and purple. These are created by mixing two primary colors. For example, yellow and blue make green, blue and red make purple, and red and yellow make orange.
- Tertiary Colors: These are created by mixing a primary color with a neighboring secondary color. Examples include red-orange, yellow-green, and blue-violet.
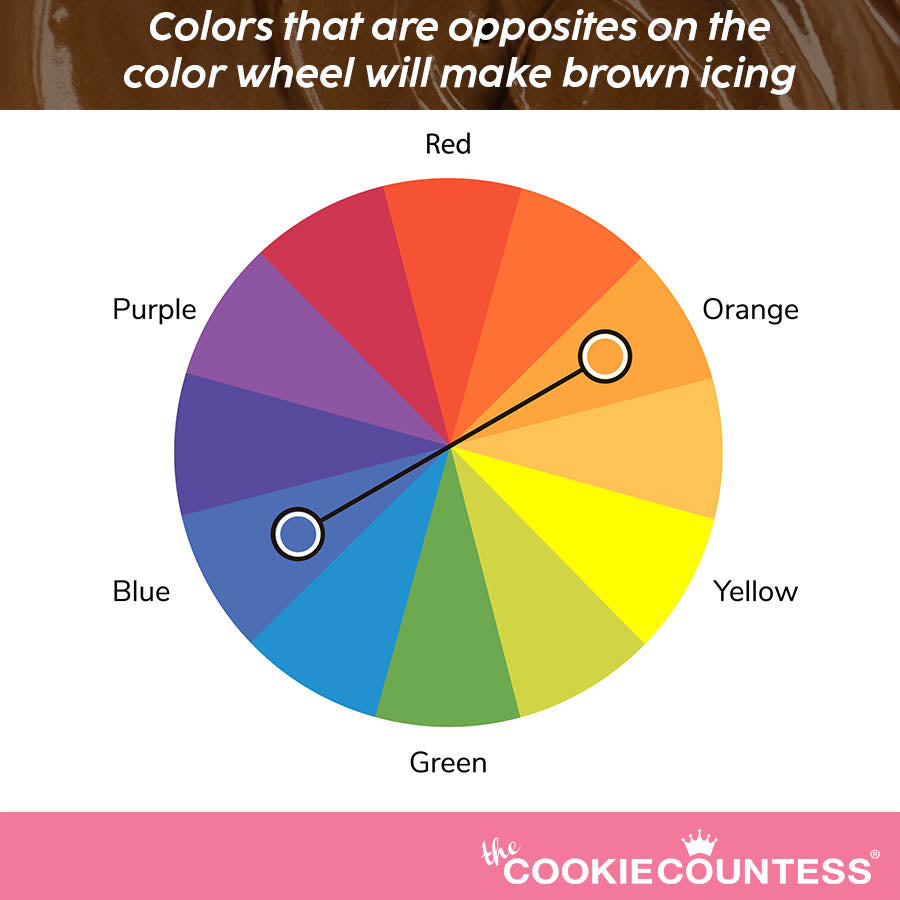
3.2 Complementary Colors
In color theory, complementary colors are pairs of colors that are opposite each other on the color wheel. When mixed together, complementary colors neutralize each other, resulting in a shade of brown.
The primary complementary color pairs are:
- Yellow and Purple
- Blue and Orange
- Red and Green
3.3 Mixing Complementary Colors
To make brown icing using food colors, mix equal amounts of complementary colors. For example, you can mix red and green, blue and orange, or yellow and purple. Start with a small amount of each color and gradually add more until you achieve your desired shade of brown.
3.4 Adjusting the Shade
To adjust the shade of brown, you can alter the ratios of the complementary colors. Adding more of one color will shift the brown towards that color’s hue. For example, adding more red to a red and green mixture will result in a warmer, reddish-brown.
4. Food Color Mixing Chart for Brown Icing
Here’s a helpful chart with specific color combinations to achieve different shades of brown, especially when using Cookie Countess gel colors. These combinations will generally leave you with earthy tones.
4.1 Color Combination Chart
| Combination | Resulting Shade |
|---|---|
| Royal Red Velvet + Gourmet Green | Earthy Brown |
| True Blue + Outrageously Orange | Earthy Brown |
| Sunshine Yellow + Positively Purple | Earthy Brown |

4.2 Deepening the Shade
To achieve an even deeper shade of brown, add a small amount of the primary color opposite to the complementary combination. For example:
- Red (Royal Red Velvet) + Green (Gourmet Green) + Yellow (Sunshine Yellow)
- Red (Royal Red Velvet) + Green (Gourmet Green) + Blue (True Blue)
- Blue (True Blue) + Orange (Outrageously Orange) + Red (Royal Red Velvet)
- Blue (True Blue) + Orange (Outrageously Orange) + Yellow (Sunshine Yellow)
- Yellow (Sunshine Yellow) + Purple (Positively Purple) + Red (Royal Red Velvet)
- Yellow (Sunshine Yellow) + Purple (Positively Purple) + Blue (True Blue)
4.3 Tips for Color Mixing
- Start Small: Begin with a small amount of each color and gradually add more until you achieve the desired shade. It’s easier to darken the color than to lighten it.
- Use Gel Colors: Gel food colors are more concentrated than liquid colors, so they provide a more intense color with less liquid, which helps maintain the consistency of your icing.
- Mix Thoroughly: Ensure you mix the colors thoroughly to avoid streaks or uneven coloring in your icing.
- Let it Rest: After mixing, let the icing sit for a few minutes. The color will often deepen slightly as it rests.
5. Exploring Different Shades of Brown
Achieving the perfect shade of brown icing often involves experimenting with different colors and techniques. By understanding how to manipulate color combinations, you can create a wide range of brown hues to suit your baking needs.
5.1 Using Different Shades of Colors
Experimenting with different shades of the same color can lead to unique variations of brown. For example, instead of using Royal Red Velvet, try adding Brick Red gel food color. Similarly, using Succulent Green, Forest Green, Ultra Blue, or Mermaid Teal instead of Gourmet Green or True Blue can create distinct brown shades.
5.2 Creating Warm Browns
To create a warm brown, lean towards using more red or orange in your color combinations. For instance, mixing Brick Red with a touch of green and a hint of yellow will produce a warm, earthy brown.
5.3 Achieving Cool Browns
For a cooler brown, incorporate more blue or purple into your mixtures. Combining True Blue with orange and a touch of red will result in a cooler, more muted brown.
5.4 Natural Food Coloring Options
If you prefer natural food coloring options, consider using vegetable-based dyes. Beetroot powder can add a reddish-brown hue, while spirulina can contribute a greenish-brown tone. Experiment with these natural colorings to achieve unique and subtle shades of brown.
6. Troubleshooting Common Issues
Even with the best techniques, you might encounter some issues when making brown icing. Here are a few common problems and how to troubleshoot them:
6.1 Icing is Too Thin
If your icing becomes too thin after adding color, you can thicken it by gradually adding powdered sugar. Mix well after each addition until you achieve the desired consistency.
6.2 Icing is Too Thick
If your icing is too thick, add a small amount of water or milk, one drop at a time, until it reaches the right consistency.
6.3 Color is Not Deep Enough
If the color of your icing is not deep enough, add more of the appropriate food colors, mixing well after each addition. Remember to use gel colors for the most concentrated color.
6.4 Color is Uneven
If the color of your icing is uneven, continue mixing until the colors are fully incorporated. If using cocoa powder, sift it before adding it to the icing to prevent lumps.
6.5 Avoiding a Muddy Color
To avoid a muddy or dull brown, be cautious when mixing colors. Add small amounts of each color and mix thoroughly before adding more. Avoid overmixing, as this can also lead to a muddy color.
7. Perfecting Your Icing Consistency
The consistency of your icing is just as important as the color. Whether you’re making royal icing, buttercream, or any other type of icing, achieving the right consistency is crucial for decorating success.
7.1 Royal Icing Consistency
Royal icing is used for detailed decorating work, such as outlining and flooding cookies. It requires different consistencies for different tasks.
- Outlining Consistency: This is a thicker consistency used for creating borders and outlines. It should hold its shape and not spread.
- Flooding Consistency: This is a thinner consistency used for filling in the outlined areas. It should spread smoothly and evenly.
To achieve the right consistencies, adjust the amount of water you add to the icing. For outlining consistency, add water sparingly. For flooding consistency, add water one drop at a time until the icing flows smoothly.
7.2 Buttercream Consistency
Buttercream is a popular choice for frosting cakes and cupcakes. The ideal consistency for buttercream is smooth, creamy, and easy to spread.
- Too Thick: If your buttercream is too thick, add a small amount of milk or cream until it reaches the desired consistency.
- Too Thin: If your buttercream is too thin, refrigerate it for a short period to firm it up. You can also add a small amount of powdered sugar to thicken it.
7.3 Tips for Perfect Consistency
- Use a Stand Mixer: A stand mixer can help you achieve a smooth and consistent icing.
- Sift Ingredients: Sift powdered sugar and cocoa powder to prevent lumps.
- Adjust Gradually: Add liquids and powders gradually, mixing well after each addition.
- Test the Consistency: Before decorating, test the consistency of your icing by piping a small amount onto a plate. Adjust as needed.
8. Storage Tips for Brown Icing
Proper storage is essential to maintain the quality and consistency of your brown icing. Here are some tips for storing different types of icing:
8.1 Royal Icing Storage
Royal icing can be stored at room temperature in an airtight container for up to two weeks. To prevent it from drying out, cover the surface of the icing with plastic wrap, pressing it directly onto the icing.
8.2 Buttercream Storage
Buttercream can be stored in the refrigerator for up to one week or in the freezer for up to three months. Store it in an airtight container to prevent it from absorbing odors. Before using refrigerated or frozen buttercream, allow it to come to room temperature and rewhip it to restore its creamy texture.
8.3 General Storage Tips
- Airtight Containers: Always use airtight containers to prevent icing from drying out or absorbing odors.
- Cool, Dark Place: Store icing in a cool, dark place to maintain its color and consistency.
- Label and Date: Label and date your stored icing so you know when it was made and when it should be used.
9. Creative Uses for Brown Icing
Brown icing is versatile and can be used in a variety of creative ways to decorate your baked goods. Here are some ideas to inspire you:
9.1 Chocolate Drip Cakes
Create a stunning chocolate drip cake by pouring melted brown icing over the edges of your cake. This technique adds a dramatic and delicious touch to any celebration cake.
9.2 Cookie Decorating
Use brown royal icing to decorate cookies with intricate designs. Create detailed patterns, monograms, or themed decorations for holidays and special occasions.
9.3 Cupcake Toppers
Pipe brown buttercream onto cupcakes to create beautiful swirls and rosettes. Add sprinkles, chocolate shavings, or other toppings to enhance the visual appeal.
9.4 Cake Borders
Use brown icing to create decorative borders around your cakes. Pipe shells, ropes, or other patterns to add a professional touch to your creations.
9.5 Fondant Accents
Use brown icing to add details to fondant decorations. Paint intricate designs, create shadows, or add texture to your fondant creations.
10. Why Choose Larosafoods.com for Your Baking Needs?
At larosafoods.com, we are dedicated to providing you with a wide range of recipes, tips, and techniques to enhance your baking experience. Whether you’re looking for classic recipes or innovative ideas, we have something for everyone.
10.1 Extensive Recipe Collection
Explore our extensive collection of recipes, categorized by dish, ingredient, country, and dietary preference. From simple weeknight meals to elaborate desserts, you’ll find inspiration for every occasion.
10.2 Detailed Technique Guides
Master essential cooking techniques with our detailed guides. Learn how to make brown icing without brown food coloring, perfect your buttercream consistency, and create stunning cake decorations.
10.3 Nutritional Information
Access detailed nutritional information for a wide variety of foods. Make informed choices about your diet and discover healthy ways to enjoy your favorite dishes.
10.4 Meal Planning Tips
Get inspired with our meal planning tips and ideas. Plan your meals for the week, create shopping lists, and discover delicious and nutritious recipes that fit your lifestyle.
10.5 Community Engagement
Join our online community of food lovers and share your experiences, recipes, and tips. Connect with like-minded individuals, ask questions, and get inspired by others.
Ready to elevate your baking skills? Visit larosafoods.com today and discover a world of culinary possibilities! Our extensive collection of recipes, detailed technique guides, and expert tips will help you create delicious and beautiful baked goods that impress your friends and family. Don’t miss out—explore larosafoods.com now and start your baking adventure!
Address: 1 S Park St, San Francisco, CA 94107, United States
Phone: +1 (415) 987-0123
Website: larosafoods.com
Frequently Asked Questions (FAQs)
1. Can I use liquid food coloring instead of gel food coloring?
Yes, you can use liquid food coloring, but gel food coloring is more concentrated and won’t change the consistency of your icing as much. If using liquid, add it sparingly to avoid thinning the icing too much.
2. What if I don’t have complementary colors?
If you don’t have complementary colors, you can try mixing primary colors to create secondary colors. For example, mix red and yellow to make orange, then mix orange with blue to get brown.
3. How can I make a deeper brown color?
To make a deeper brown color, add more of the darker complementary color, such as red or blue. You can also add a touch of black food coloring, but use it sparingly as it can quickly darken the icing too much.
4. Is it possible to make brown icing without any food coloring or cocoa powder?
It’s challenging, but you can try using natural ingredients like coffee or espresso powder for a subtle brown tint and flavor. Beets or other vegetable powders can also add color, but the results may vary.
5. How do I prevent my icing from tasting bitter when using cocoa powder?
To prevent bitterness, use high-quality Dutch-processed cocoa powder and balance the flavor with a touch of vanilla extract or a pinch of salt.
6. Can I store colored icing?
Yes, you can store colored icing in an airtight container in the refrigerator for up to a week. Be sure to bring it to room temperature and rewhip it before using.
7. What’s the best type of icing for coloring?
Royal icing and buttercream are the best types of icing for coloring because they have a neutral base that allows the colors to show up vibrantly.
8. How do I avoid streaks in my colored icing?
To avoid streaks, mix the food coloring thoroughly into the icing. Use a stand mixer or hand mixer to ensure even distribution of the color.
9. Can I use natural food dyes to make brown icing?
Yes, you can use natural food dyes like beet juice, carrot juice, or spinach juice to create different shades of brown. Keep in mind that natural dyes may not be as vibrant as artificial colors.
10. What do I do if my icing is too sweet after adding color?
If your icing is too sweet, add a small amount of lemon juice or a pinch of salt to balance the sweetness. Mix well and taste before adding more.