

Canning is a time-honored and effective method for preserving food at home, ensuring you can enjoy the bounty of each season throughout the year. When done correctly, it’s a safe way to prevent spoilage and foodborne illnesses, allowing you to store fruits, vegetables, and more for extended periods. The process of canning involves sealing food in airtight jars and heating them to a temperature that eliminates harmful microorganisms and inactivates enzymes that could lead to spoilage. As the jars cool, a vacuum seal forms, preventing new contaminants from entering.
However, safety is paramount when canning food at home. Improper canning techniques can lead to serious health risks, most notably botulism. Botulism, a severe form of food poisoning, is often linked to improperly home-canned foods. It’s crucial to follow research-based canning methods meticulously to avoid such dangers. Many cases of foodborne illnesses from home-canned goods are traced back to deviations from approved instructions, particularly the failure to use pressure canners for low-acid foods or ignoring signs of spoilage.
Clostridium botulinum bacteria pose the primary risk in home canning, especially for low-acid foods. While boiling temperatures can kill the bacterial cells, their spores are resilient and can survive. These spores thrive in low-acid, air-free environments like canned vegetables and meats, where they can grow and produce the deadly botulinum toxin. To eliminate these spores effectively, temperatures of 240°F or higher for a specific duration are required, temperatures achievable only with a pressure canner.
Understanding Safe Canning Methods
There are three primary safe canning methods, each suited to different types of food: boiling water bath canning, atmospheric steam canning, and pressure canning. Choosing the right method is crucial for safety and food quality.
Boiling Water Bath Canning: This method is ideal for high-acid foods, including fruits, tomatoes (with added acid), pickles, jams, jellies, and preserves. In boiling water bath canning, jars are submerged completely in boiling water (212°F at sea level).
High-acid foods (with a pH of 4.6 or lower) naturally inhibit the growth of Clostridium botulinum spores and toxin production. This category includes most fruits and properly acidified vegetables. Tomatoes and figs, being borderline in acidity, require added acid like lemon juice or citric acid to be safely canned using a boiling water bath.
Atmospheric Steam Canning: Atmospheric steam canners are also suitable for high-acid or properly acidified foods with a pH of 4.6 or less. This includes most fruits, preserves, and pickled vegetables, similar to boiling water bath canning. However, steam canning is not appropriate for low-acid foods like vegetables and meats.
While initially, steam canners lacked sufficient research to be widely recommended, recent studies have validated their safety when specific guidelines are followed. Steam canners offer advantages like using less water, reaching processing temperatures faster, and requiring less energy compared to boiling water bath canners. In a steam canner, jars are placed on a rack above boiling water, and the steam provides the necessary heat treatment.
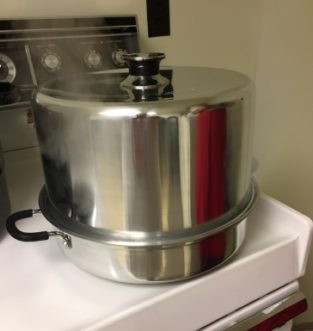
Pressure Canning: Pressure canning is the only safe method for low-acid foods (pH above 4.6), such as all vegetables, meats, poultry, and seafood. Due to the botulism risk, these foods must be processed in a pressure canner to reach the high temperatures needed to destroy Clostridium botulinum spores.
In pressure canning, jars are placed in 2 to 3 inches of water within a pressure canner and heated to at least 240°F. This high temperature, unattainable in boiling water, ensures the destruction of botulism spores.
Selecting a Safe Canning Recipe
Always use recipes specifically designed for canning and from reputable, research-based sources. Reliable sources include the USDA, the National Center for Home Food Preservation, and university extension services. Canning recipes should provide detailed instructions on ingredients, preparation, and processing times for both acidic and acidified foods.
Altitude adjustments are crucial if you are canning above 1,000 feet. Canning recipes are typically designed for altitudes between 0-1,000 feet. Higher altitudes require increased processing times due to the lower boiling point of water. Consult your local extension office for altitude-specific adjustments.
Preparing for the Canning Process
Proper preparation is key to successful and safe canning. Before you start, assemble and thoroughly wash all your equipment and canning jars. Choose fresh, high-quality produce at its peak ripeness, avoiding overripe or damaged items. Process fruits and vegetables within 2 to 3 hours of harvesting or purchasing to ensure optimal quality.
Wash produce meticulously, handling small batches at a time. Lift the food out of the wash water rather than soaking it to preserve flavor and nutrients. Rinse repeatedly until the water is clear, as dirt can harbor resilient bacteria. Never can decayed or damaged foods.
Jar and Lid Preparation: Inspect canning jars carefully for any nicks, cracks, or rough edges, which can prevent a proper seal and lead to spoilage. Wash all jars in hot, soapy water, rinse thoroughly, and keep them hot until filling. This can be done in a dishwasher or by immersing them in hot water in your canner. Preheating jars helps prevent breakage when filled with hot food and placed in the canner.
For boiling water bath canning processes lasting less than 10 minutes, sterilize jars by boiling them for 10 minutes before filling. For altitudes above 1,000 feet, add one minute of boiling time for each additional 1,000 feet. Sterilization is not required for jars processed for 10 minutes or more in a boiling water bath or in a pressure canner, as sterilization occurs during processing.
Always use new two-piece canning lids. Follow the manufacturer’s instructions for lid preparation, which may involve simmering them in hot water but not boiling.
Packing Methods: Raw Pack vs. Hot Pack
There are two primary methods for packing food into jars: raw pack and hot pack. The choice depends on the type of food and personal preference. Both methods require sufficient liquid (syrup, water, or juice) to fill around the solid food and cover it completely. Uncovered food may discolor and develop off-flavors. Typically, ½ to 1½ cups of liquid are needed per quart jar.
Raw Pack: This method involves placing raw, unheated food directly into jars. Boiling liquid (water, juice, or syrup) is then poured over the raw food to achieve the correct headspace.
Fruits and most vegetables packed raw should be packed tightly as they tend to shrink during processing. However, exceptions include corn, lima beans, potatoes, and peas, which should be packed loosely as they expand during canning.
Hot Pack: In the hot pack method, food is preheated to boiling or cooked for a specified time before being packed hot into jars and covered with boiling liquid. Hot packing is generally preferred as it improves color and flavor retention, especially for foods processed in a boiling water bath. Pre-shrinking occurs during preheating, so hot-packed foods should be packed loosely to ensure adequate liquid circulation around the food.
Step-by-Step Guide to Boiling Water Bath Canning
Boiling water bath canning is specifically for high-acid foods like fruits, properly acidified tomatoes, and pickles.
- Prepare the Canner: Fill the canner halfway with hot water and begin heating. For raw-packed jars, keep the water hot but not boiling. For hot-packed jars, use hot or gently boiling water.
- Fill Jars: Fill each jar individually using your chosen packing method (raw or hot pack), leaving the recommended headspace.
- Remove Air Bubbles: Use a bubble remover or a non-metallic utensil to gently release trapped air bubbles by running it along the inside edge of the jar. Add more liquid if needed to maintain proper headspace.
- Wipe Jar Rims: Clean the jar rims with a damp cloth to ensure a clean sealing surface.
- Apply Lids and Rings: Center lids on the jars and screw on ring bands fingertip-tight. Do not overtighten, as air needs to escape during processing.
- Load Canner: Place filled jars on the canner rack. Add boiling water, if necessary, to ensure the water level is at least 1 inch above the jar tops. Pour water between jars, not directly onto them, to prevent thermal shock. Cover the canner and bring the water to a rolling boil over high heat.
- Process: Once a rolling boil is achieved, start timing the processing according to your recipe. Maintain a steady boil throughout the processing time, adjusting heat as needed and adding more boiling water if the level drops. If the boil stops at any point, return to a vigorous boil and restart the timing from the beginning.
- Cool Down: After processing is complete, turn off the heat and remove the canner lid. Wait for 5 minutes before removing jars.
- Remove Jars: Use a jar lifter to carefully remove jars and place them upright on a cake cooling rack or dry towel, ensuring at least 1 inch of space between jars for air circulation. Avoid placing hot jars on cold surfaces or in drafts. Do not cover or wrap jars.
- Cool and Check Seals: Let jars cool undisturbed for 12 to 24 hours. Do not tighten ring bands or press on lids during cooling. As jars cool, you should hear a popping sound as they seal. After cooling, check each lid for a proper seal: it should be concave and not move when pressed.
Step-by-Step Guide to Atmospheric Steam Canning
Atmospheric steam canning is suitable for high-acid foods, similar to boiling water bath canning, but with specific requirements.
- Vent the Canner: Before processing, vent the steam canner until a steady stream of pure steam emerges. This ensures the canner reaches the correct temperature. Exercise caution around hot steam to avoid burns. Maintain a consistent temperature of 212°F (at sea level) throughout the processing time, monitoring with a thermometer placed in the vent hole, ensuring it doesn’t touch a jar. Avoid overly vigorous boiling, which can deplete the water reservoir too quickly.
- Preheat Jars and Fill: Preheat jars before filling and use hot liquid for both raw and hot-packed foods to minimize cooling before processing.
- Process Jars: Process jars for the full time specified in your recipe, ensuring sufficient water for steam throughout.
- Cool Down: After processing, turn off the heat and carefully remove the lid, directing steam away from you. Wait 5 minutes before removing jars with a jar lifter.
- Cool and Check Seals: Cool jars on a rack or towel at room temperature, away from drafts, with at least 1 inch of space between them, for 12-24 hours. Avoid forced cooling to ensure pathogen destruction. Check for proper seals as described for boiling water bath canning.
Step-by-Step Guide to Pressure Canning
Pressure canning is essential for safely preserving low-acid foods. Always refer to your pressure canner’s manufacturer instructions. Dial-gauge canners require annual accuracy testing.
- Prepare Canner: Add 2 to 3 inches of water to the canner (hot water for raw pack, hot or gently boiling for hot pack), ensuring this water level is maintained when loading jars.
- Fill Jars: Fill jars using raw or hot pack methods, leaving proper headspace. Remove air bubbles, wipe rims, and apply lids and rings as in boiling water bath canning.
- Load Canner and Vent: Place jars on the canner rack, ensuring steam can circulate. Secure the lid, leaving the vent open. Heat on high until steam vents steadily for 10 minutes to remove air.
- Pressurize: Close the vent using a weight, valve, or screw. For dial-gauge canners, increase pressure to 8 PSI quickly, then adjust heat to reach and maintain the recipe-specified pressure. For weighted-gauge canners, adjust heat until the weight rocks gently or jiggles as per manufacturer instructions. Start timing when the correct pressure is reached.
- Process: Maintain a steady pressure at or slightly above the required level throughout the processing time, adjusting heat as needed. If pressure drops below the recommended level, bring it back up and restart the timing from the beginning.
- Depressurize: When processing is complete, remove the canner from heat or turn it off. Allow pressure to drop to zero naturally (30-45 minutes for standard canners, longer for larger ones). Do not force cooling.
- Cool Canner: Depressurization is complete when a dial gauge reads zero or a weighted gauge shows no steam release when nudged. Newer canners may have a safety lock that releases when depressurized. Open the vent or remove the weight, wait 10 minutes, then carefully open the canner lid, tilting it away from you to avoid steam burns.
- Remove Jars: Use a jar lifter to remove jars and place them on a rack or towel, leaving 1 inch of space between. Do not tighten rings or touch lids.
- Cool and Check Seals: Cool undisturbed for 12-24 hours and check for proper seals as described for boiling water bath canning.
Safe Handling of Processed Jars
Testing for a Proper Seal: Listen for a “pop” sound as jars cool, indicating sealing. Once cooled, check the lid: it should be curved downwards and firm when pressed. Unsealed jars should be refrigerated and used within 2-3 days, reprocessed within 24 hours, or frozen.
Labeling and Storing Jars: Remove ring bands to prevent rust. Wash and dry bands for reuse. Wash jar exteriors, label with contents, date, and lot number if applicable. Store in a cool, dark, dry place (50-70°F ideally), away from heat and direct sunlight. Use canned foods within one year for best quality.
Reprocessing Unsealed Jars
Reprocess unsealed jars within 24 hours. Remove the lid, check the jar rim for defects, replace the jar if necessary, add a new lid, and reprocess using the original processing time. Label recanned jars and use them first, as the food quality may be slightly reduced.
Guarding Against Spoilage
Never taste or use canned foods showing any signs of spoilage. Before opening, inspect jars for bulging lids or leaks. Upon opening, look for spurting liquid, off-odors, or mold. Dispose of spoiled food safely where it cannot be consumed by humans or pets.
Suspect spoiled low-acid foods (vegetables, meats, seafood, tomatoes) may contain botulinum toxin and must be handled with extreme care.
Detoxification of Spoiled Low-Acid Foods:
For sealed jars: Place in a heavy garbage bag, seal, and dispose in trash or landfill.
For unsealed, open, or leaking jars: Detoxify before disposal.
Detoxification Steps:
- Carefully place jars on their sides in an 8-quart or larger pot.
- Wash gloved hands thoroughly.
- Cover jars completely with water, at least 1 inch above.
- Cover pot and bring to a boil.
- Boil for 30 minutes to detoxify food and containers.
- Cool and discard containers, lids, and food in trash or landfill.
Cleaning Contaminated Surfaces:
- Wear rubber or plastic gloves.
- Use a fresh solution of 1 part unscented liquid household bleach (5-6% sodium hypochlorite) to 5 parts water.
- Spray or wet contaminated surfaces with bleach solution; let stand for 30 minutes. Avoid inhaling bleach or skin contact.
- Wipe spills with paper towels, dispose of towels in a plastic bag in trash.
- Reapply bleach solution, let stand 30 minutes, and rinse.
- Wash all detoxified items and clothing.
- Discard gloves after cleaning.
By following these comprehensive guidelines, you can confidently and safely can food at home, preserving freshness and flavor while minimizing health risks. Always prioritize safety, use research-based recipes, and inspect your canned goods carefully before consumption.