

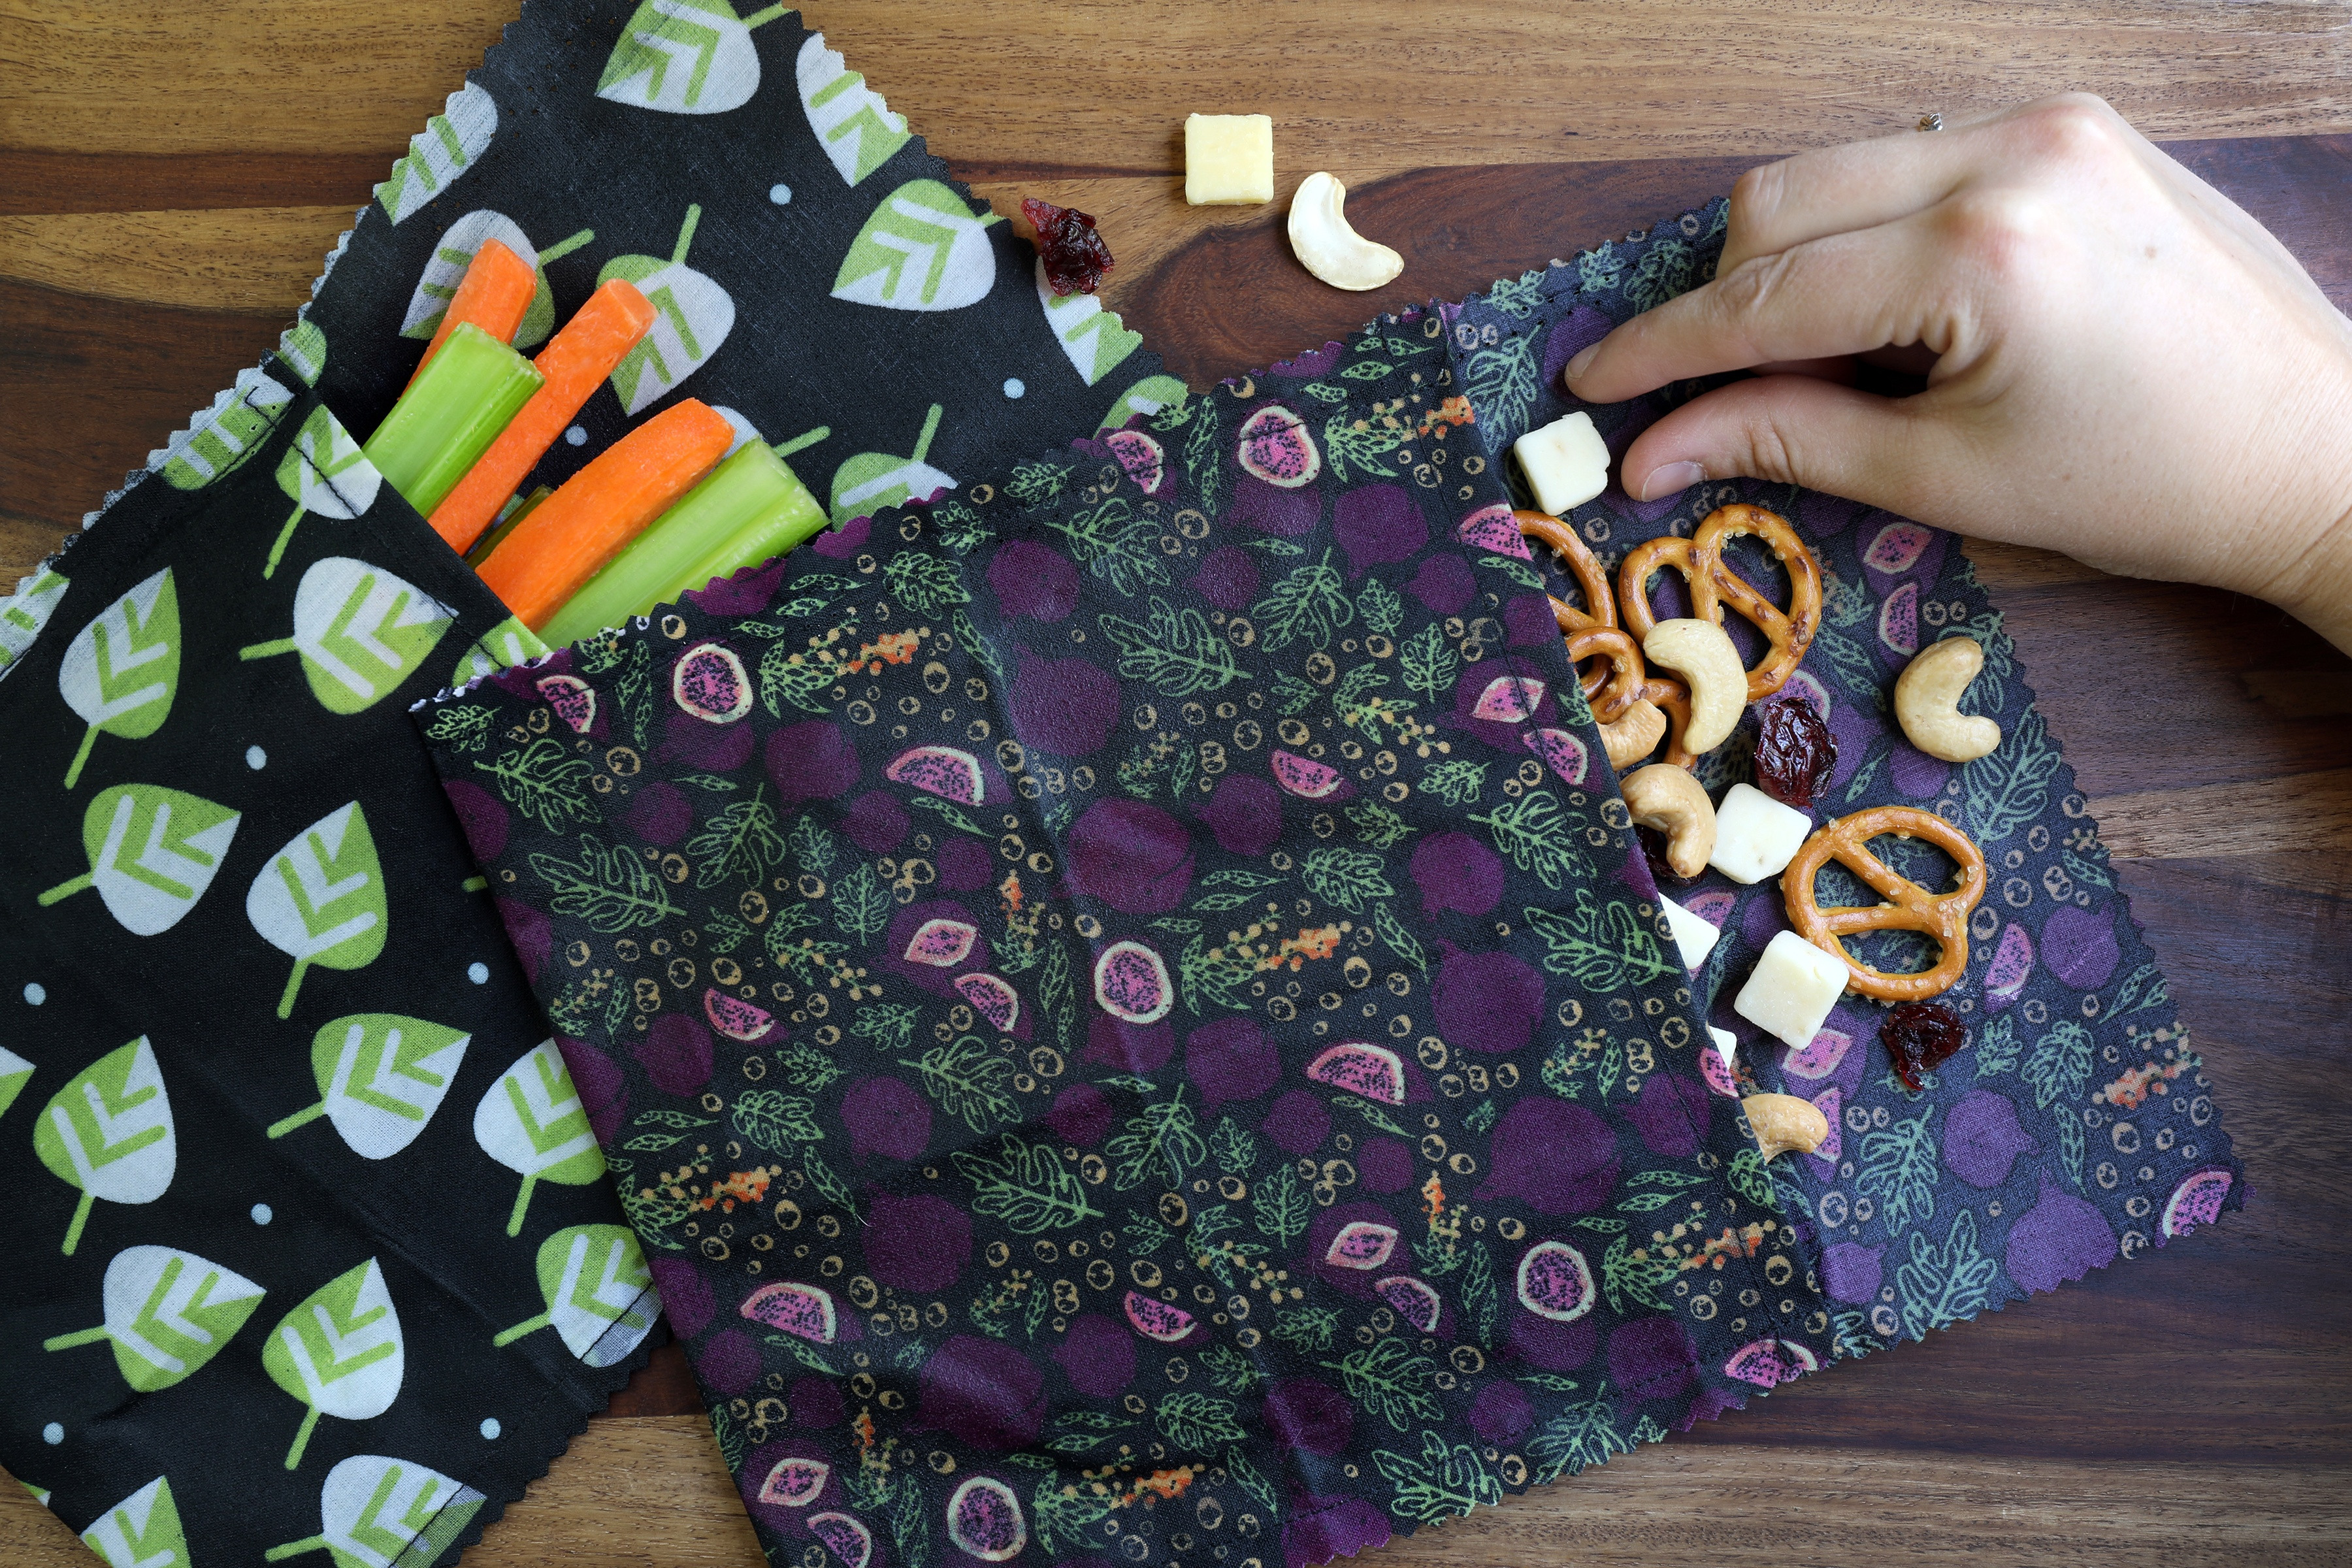
Tired of single-use plastic wrap? Discover how to make your own reusable food wraps at home! These eco-friendly alternatives are perfect for wrapping leftovers, cheese, fruits, vegetables, and covering bowls. This guide provides step-by-step instructions for both beeswax and vegan food wraps, ensuring you have sustainable options for your kitchen.
For years, I’ve been searching for a reliable alternative to plastic wrap. Silicone lids were cumbersome, and then I discovered beeswax wraps – a true kitchen revolution! They are versatile, reusable, and perfect for a variety of food storage needs. Inspired, I embarked on a journey to create my own homemade versions, experimenting with different recipes to find the best method. After weeks of trial and error, I’m excited to share the ultimate DIY guide to making your own reusable food wraps.
My initial experiments involved various combinations of ingredients, each with varying degrees of success. From beeswax-only wraps that were too stiff, to coconut oil versions that left a messy residue, the journey was filled with learning curves. However, these trials led to the discovery of two fantastic recipes: one using beeswax and another, a vegan alternative with carnauba wax.
The Best Beeswax Food Wrap Recipe
This recipe creates (2 to 3) 12 x 12 inch reusable food wraps.
Ingredients:
- 100% cotton fabric, organic preferred
- 0.35 oz. sustainably sourced pine resin
- 1.25 oz. beeswax pastilles or grated beeswax
- 1 Tbsp. organic jojoba oil
- Large popsicle stick or compostable stirrer
- Parchment paper
- Dedicated paintbrush
Equipment:
- Double boiler or glass measuring cup and saucepan
- Cookie sheet
- Oven
Instructions:
- Prepare the Fabric: Wash and thoroughly dry your cotton fabric. Cut it into the desired shapes and sizes for your food wraps. Pinking shears can help reduce fraying.
- Combine Ingredients: In a double boiler or glass measuring cup set in a saucepan, combine the pine resin, beeswax, and jojoba oil.
- Melt the Mixture: Add water to the saucepan until it reaches below the waterline of the double boiler or measuring cup. Heat over medium-high heat until all ingredients are fully melted and melded together, approximately 20-25 minutes. Stir occasionally with your popsicle stick.
- Preheat Oven and Prepare Baking Sheet: Preheat your oven to 300°F (150°C). Cover a large cookie sheet with parchment paper, ensuring it’s larger than your fabric pieces.
- Apply Wax Mixture: Lay a piece of fabric flat on the parchment-lined cookie sheet. Using your paintbrush, lightly brush the melted wax mixture evenly onto the fabric. It’s best to start with a thin coat; you can always add more.
- Bake Briefly: Place the cookie sheet in the preheated oven for about 2 minutes, or until the fabric appears wet and the mixture is evenly distributed.
- Even Out Coating: Remove the cookie sheet from the oven. Check for any dry spots and brush the mixture over those areas. If the coating is uneven, return it to the oven for a few more minutes to smooth out.
- Remove Excess Wax (Optional): To prevent overly saturated wraps, place the next piece of fabric you are preparing on top of the freshly coated wrap while the wax is still melted. This will help absorb any excess mixture.
- Dry the Wraps: Carefully peel the wraps apart and hang them to dry. Drying usually takes only a few minutes. Clothes pins and a string work well for this.
- Repeat: Continue steps 5-9 with the remaining fabric pieces and wax mixture until you have used all the coating.
Vegan Food Wrap Recipe (Bee-Free)
This recipe creates (2 to 3) 12 x 12 inch vegan reusable food wraps.
Ingredients:
- 100% cotton fabric, organic preferred
- 0.75 oz. sustainably sourced pine resin
- 0.5 oz. organic carnauba wax
- 1 Tbsp. organic jojoba oil
- Large popsicle stick or compostable stirrer
- Parchment paper
- Dedicated paintbrush
Equipment:
- Double boiler or glass measuring cup and saucepan
- Cookie sheet
- Oven
Instructions:
- Prepare Fabric: Wash and dry your fabric and cut into desired sizes and shapes.
- Combine Ingredients: In a double boiler or glass measuring cup set in a saucepan, combine the pine resin, carnauba wax, and jojoba oil.
- Melt the Mixture: Add water to the saucepan to create a water bath. Heat over medium-high heat, allowing the ingredients to melt and blend thoroughly, approximately 20-25 minutes. Stir occasionally.
- Preheat Oven and Prepare Baking Sheet: Preheat oven to 300°F (150°C). Line a cookie sheet with parchment paper.
- Apply Wax Mixture: Place a fabric piece on the parchment paper. Brush a light, even coat of the melted vegan wax mixture onto the fabric.
- Bake Briefly: Bake in the preheated oven for about 2 minutes, or until the fabric looks saturated with the mixture.
- Even Out Coating: Remove from the oven and address any dry spots with more mixture. Return to the oven briefly if needed for smoothness.
- Remove Excess Wax (Optional): Place the next fabric piece on top to absorb extra coating.
- Dry the Wraps: Separate the wraps and hang them to air dry.
- Repeat: Repeat steps 5-9 until all fabric and mixture are used.
This vegan recipe might require a little more experimentation to perfect, depending on your materials.
Troubleshooting Tips for Both Recipes:
- Too Sticky: Reduce the amount of pine resin slightly.
- Too Oily: Decrease the jojoba oil. Start by reducing to 2 teaspoons and adjust further if needed.
- Too Stiff: Decrease the wax content. You might have also over-saturated the fabric; use a lighter coat next time.
Pro Tips for Success:
- Fabric Choice: Thin, 100% cotton fabric works best. It clings well and absorbs less of the mixture, making coating easier.
- Drying Setup: Prepare a drying space before you begin. A string and clothes pins are ideal.
- Care Instructions: Wash your reusable food wraps in cool water with mild soap, like Castille soap, and air dry. Store them folded in a drawer away from heat and sunlight.
- Adjust Stickiness: Modify the amount of resin to adjust the stickiness to your preference. The ratios provided are a great starting point.
- Residue Removal: If your wraps leave a slight residue on glassware initially, use baking soda, soap, and warm water with a scrub sponge to remove it.
- Refresh Your Wraps: Every 6-12 months, refresh your wraps by reheating them in the oven and brushing on a light coat of the melted wax mixture.
- Light Coating is Key: Start with a thin coat of the mixture to avoid over-saturation. You can always add more.
- Enhance Cling: For extra cling, especially on bowls, use a rubber band to secure your food wrap.
Make the switch to reusable food wraps and enjoy a more sustainable kitchen! These DIY wraps are not only eco-friendly but also customizable and cost-effective.