

Dyeing Easter eggs is a cherished spring tradition, bringing joy and creativity to households as families gather to transform plain eggs into vibrant works of art. Forget expensive, limited-color egg dyeing kits! Did you know you can create a stunning spectrum of over 40 different shades using simple food coloring and vinegar, readily available at your local grocery store? This guide will walk you through the easy steps and precise formulas to master the art of Easter egg dyeing with food coloring, ensuring a fun and colorful Easter celebration.
Why Choose Food Coloring for Easter Eggs?
Opting for food coloring to dye Easter eggs offers numerous advantages over pre-packaged kits. Firstly, it’s incredibly cost-effective. Instead of purchasing a new kit each year, a few bottles of food coloring will last for multiple Easter seasons, and can also be used for baking and other culinary creations. Secondly, food coloring provides unparalleled color customization. By mixing different shades and varying the concentration, you can achieve an endless array of hues, from soft pastels to deep, rich tones. This allows for far more creativity and personalization than the limited color options in most kits. Finally, food coloring is easily accessible. You can find it in any grocery store, making it a convenient choice for a last-minute Easter activity or a planned family project. Embrace the simplicity and versatility of food coloring to elevate your Easter egg dyeing experience this year.
Essential Supplies for Egg Dyeing
Before you begin your colorful egg transformation, gather these simple supplies to ensure a smooth and enjoyable dyeing process:
- Eggs: You can use either white or brown eggs, depending on the desired color vibrancy. White eggs will produce brighter, truer colors, while brown eggs will result in richer, more muted, jewel-toned shades. Choose between raw or hard-boiled eggs based on your preference and who will be participating in the dyeing activity. Hard-boiled eggs are recommended, especially when dyeing with children, to minimize mess in case of accidental cracks.
- Food Coloring: Liquid food coloring or gel food coloring are both suitable for dyeing eggs. For the widest range of colors, consider purchasing a set of primary food colors (red, yellow, blue, green) and/or a neon food coloring set. Wilton gel food coloring is a highly recommended brand known for its vibrant colors and ease of use.
- White Vinegar: Standard white vinegar from your pantry is essential for setting the dye and ensuring vibrant colors. You will need 1 teaspoon of vinegar for each color you plan to create.
- Hot Water: Hot tap water works perfectly fine, eliminating the need for boiling. You’ll need 1/2 cup of hot water for each dye color.
- Glasses or Bowls: Prepare one glass or bowl for each color you intend to mix. This will keep your colors separate and organized.
- Slotted Spoon or Whisk: Use a slotted spoon or whisk to carefully place eggs into the dye baths and remove them without scratching the delicate dyed surface.
Choosing the Right Food Coloring for Vibrant Easter Eggs
Not all food colorings are created equal when it comes to dyeing Easter eggs. While both liquid and gel food colorings can be used, understanding their nuances will help you achieve the best results.
Liquid Food Coloring: Standard liquid food coloring, commonly found in grocery stores, is a reliable and readily available option. These typically come in primary colors (red, blue, yellow, and green), which can be mixed to create a wide spectrum of shades. Liquid food coloring is easy to use and disperses well in water and vinegar solutions.
Gel Food Coloring: Gel food coloring, especially Wilton gel food coloring, is highly recommended for dyeing Easter eggs. Wilton gels are known for their concentrated pigments, resulting in more vibrant and intense colors compared to liquid food coloring. They are available in a wide array of colors, including standard and neon shades, offering extensive creative possibilities. Wilton gels dissolve smoothly in the dye mixture, ensuring even color distribution on the eggshells. Avoid gel food colorings that come in small white tubes, as these may not dissolve as effectively and can lead to uneven dyeing.
For the most versatile and vibrant Easter egg dyeing experience, consider using both Wilton Standard Food Coloring Gels and Wilton Neon Food Coloring Gels. These sets will provide you with a comprehensive palette to create a rainbow of Easter egg colors.
Preparing Your Eggs for Dyeing: Hard Boiling and Vinegar Rinse
While dyeing raw eggs is possible, hard-boiling is strongly recommended, especially when dyeing with children. Hard-boiled eggs are less fragile and minimize the mess if accidental cracking occurs during the dyeing process.
How to Hard Boil Eggs:
- Gently place a dozen eggs in a single layer at the bottom of a large saucepan.
- Cover the eggs completely with cold water, ensuring the water level is about an inch above the eggs.
- Bring the water to a rolling boil over medium heat.
- Once boiling, immediately remove the pan from the heat, cover it tightly with a lid, and let it sit for 10-12 minutes.
- After 10-12 minutes, carefully drain the hot water and rinse the eggs under cold running water or soak them in a bowl of ice water to stop the cooking process. This also makes them easier to handle for dyeing.
Optional Vinegar Rinse: For enhanced dye adhesion and more even color distribution, especially with lighter shades like blues and purples, consider a diluted vinegar rinse. Before dyeing, briefly dip the hard-boiled eggs in a solution of water and a splash of vinegar. This step is not strictly necessary for all colors but can improve the overall dyeing results.
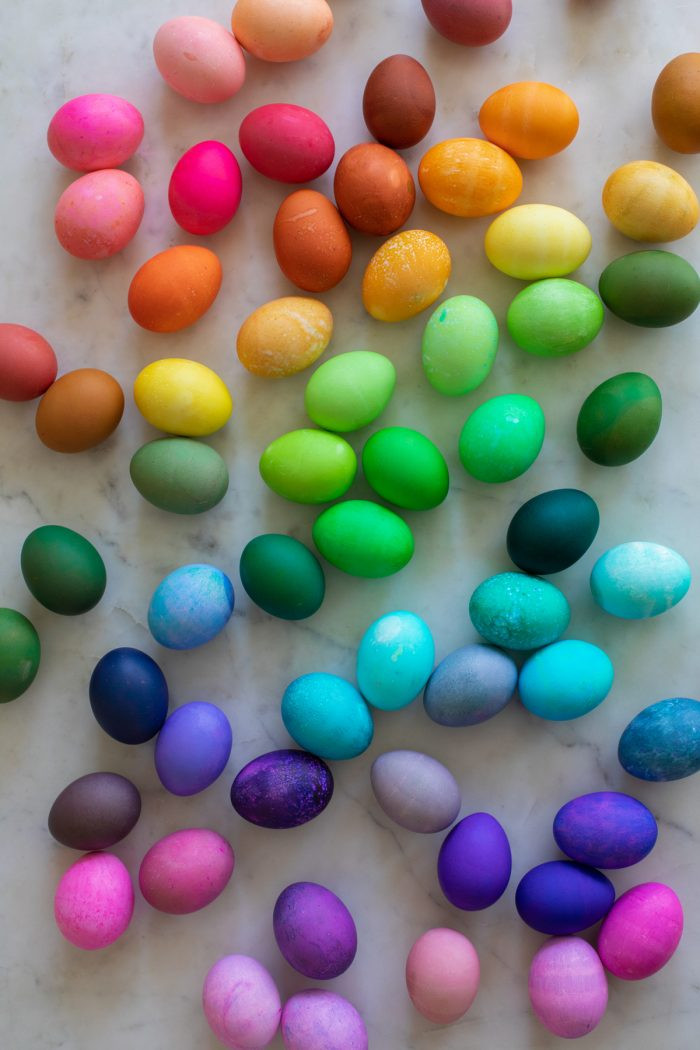
Remember that eggs are natural products, and slight variations in dyeing are normal and contribute to the charm of hand-dyed Easter eggs. As you can see in the images, some eggs may dye more uniformly than others, adding to the unique character of each egg.
Step-by-Step Guide: How to Dye Easter Eggs with Food Coloring
Follow these simple steps to dye Easter eggs using food coloring and create a vibrant Easter basket:
- Prepare the Dye Baths: In each glass or bowl, combine 1/2 cup of hot water and 1 teaspoon of white vinegar. Stir to mix.
- Add Food Coloring: Refer to the color formulas below for precise color mixing instructions. Add the recommended drops of food coloring to each water and vinegar mixture. Start with a few drops and add more gradually to achieve your desired shade. Stir the dye bath thoroughly to ensure the color is evenly dispersed.
- Dye the Eggs: Gently place an egg into each dye bath, ensuring it is fully submerged. The soaking time will vary depending on the desired color intensity and the specific color formula you are using (see guide below). For lighter shades, a shorter soaking time (around 30 seconds) is sufficient. For deeper, more saturated colors, leave the egg in the dye for a longer duration (3-5 minutes or more).
- Remove and Dry: Use a slotted spoon or whisk to carefully remove the dyed egg from the dye bath. Allow excess dye to drip back into the bowl. Place the egg on a drying rack or an upside-down egg carton to dry completely.
Pro Tip: You can reuse dye baths to create multiple shades. Start with lighter colors and gradually add more food coloring to the same dye bath to create darker variations, eliminating the need to start from scratch for each new color.
Color Formulas for Over 40+ Shades: Refer to the detailed color formulas below to create a wide spectrum of Easter egg colors, including instructions on soaking times for each shade. Feel free to experiment with these formulas and adjust the soaking times and color combinations to create your own unique Easter egg palette!
Can I Dye Brown Eggs with Food Coloring?
Yes, absolutely! While white eggs are often preferred for achieving the brightest and truest colors when dyeing, brown eggs offer a beautiful alternative, resulting in rich, jewel-toned Easter eggs. Dyeing brown eggs with food coloring creates deeper, more muted shades compared to white eggs, adding a sophisticated and natural touch to your Easter decorations.
Keep in mind that the initial brown hue of the eggshell will influence the final dyed color. Brown eggs come in a variety of shades, from light tan to dark brown, which will affect how the dye appears. When dyeing brown eggs, it’s advisable to check the color development frequently as the dye may appear differently than on white eggs.
The color formulas provided below indicate which shades are particularly well-suited for brown eggs, resulting in stunning jewel-tone effects.
Dyeing Eggs: Pink, Purple, Blue, and Green Color Formulas
Explore these color formulas to create beautiful pink, purple, blue, and green Easter eggs using food coloring:
Pink & Purple Easter Eggs:
- Bubblegum: 5 drops pink, 30 seconds or less
- Fuchsia: 5 drops pink, 3 minutes
- Lilac: 5 drops pink + 5 drops purple, 30 seconds or less
- Orchid: 5 drops pink + 5 drops purple, 3 minutes
- Ultraviolet: 5 drops purple, 3 minutes
- Grape: 10 drops purple, 5 minutes
- Lavender: 5 drops purple, 30 seconds or less
Blue Easter Eggs:
- Periwinkle: 5 drops blue + 5 drops purple, 30 seconds or less
- Cornflower: 5 drops blue + 5 drops purple, 3 minutes
- Cobalt: 5 drops blue + 5 drops purple, 5 minutes
- Navy: 5 drops blue + 5 drops purple, 5 minutes (Brown Egg)
- Sky: 5 drops blue, 3 minutes
- Robin’s Egg: 5 drops teal, 30 seconds or less
- Aqua: 5 drops blue, 30 seconds or less
- Turquoise: 5 drops teal, 3 minutes
- Peacock: 5 drops blue, 5 minutes (Brown Egg)
Green Easter Eggs:
- Mint: 5 drops teal + 3 drops green, 30 seconds or less
- Teal: 5 drops teal + 3 drops green, 3 minutes
- Emerald: 10 drops teal + 10 drops green, 3 minutes
- Shamrock: 5 drops teal + 10 drops green, 3 minutes
Dyeing Eggs: Green, Yellow, Orange, and Red Color Formulas
Continue your Easter egg dyeing adventure with these formulas for green, yellow, orange, and red shades:
Green & Yellow Easter Egg Dye:
- Evergreen: 5 drops teal, 5 minutes (Brown Egg)
- Olive: 10 drops green, 5 minutes (Brown Egg)
- Chartreuse: 5 drops green, 3 minutes
- Celery: 5 drops green, 30 seconds or less
- Butter: 10 drops yellow + 3 drops green, 30 seconds or less
- Sunshine: 10 drops yellow + 3 drops green, 3 minutes
- Daffodil: 5 drops yellow, 30 seconds or less
- Marigold: 5 drops yellow, 3 minutes
Orange Easter Egg Dye:
- Peach: 5 drops orange, 30 seconds or less
- Creamsicle: 5 drops orange, 3 minutes
- Tangerine: 5 drops orange + 5 drops yellow, 3 minutes
- Mustard: 10 drops yellow + 3 drops green, 5 minutes (Brown Egg)
- Salmon: 10 drops yellow + 5 drops red, 30 seconds or less
- Coral: 10 drops orange + 5 drops red, 3 minutes
- Rust: 10 drops orange + 5 drops red, 5 minutes (Brown Egg)
Red & Pink Easter Egg Dye:
- Watermelon: 5 drops red, 30 seconds or less
- Candy Apple: 10 drops red + 5 drops yellow, 5 minutes
- Neon: 5 drops red + 5 drops pink, 3 minutes
- Berry: 5 drops pink, 3 minutes (Brown Egg)
- Wine: 5 drops pink + 5 drops purple, 5 minutes (Brown Egg)
Tips for Drying Dyed Easter Eggs Evenly
Achieving evenly dried Easter eggs is crucial for showcasing their vibrant colors without streaks or uneven patches. Preventing dye from pooling and creating darker spots is key. Here are several effective drying methods:
- Gentle Patting with a Rag: This quick method involves carefully patting the wet egg with a soft cloth or paper towel. While efficient, be mindful that this may slightly lighten the dye color and will stain your towel. Dedicate old towels or rags specifically for egg dyeing.
- Cooling Rack: Place dyed eggs on a wire cooling rack, like those used for baking cookies. This allows air to circulate around the entire egg, promoting even drying. Be aware that the wires may leave a slight grid pattern on the egg where it rests on the rack.
- Toothpick “Stand”: Repurpose a piece of styrofoam by inserting multiple toothpicks into it. Carefully balance the dyed eggs between the toothpicks, creating a stand that elevates the eggs and allows for all-around air drying.
- Upside Down Egg Carton: Flip an empty egg carton upside down and use the pointed cones to balance the eggs for drying. While convenient, this method may not be as effective for completely even drying as some parts of the egg will still be in contact with the carton surface.
Creative Ways to Use Your Beautifully Dyed Eggs
Once you’ve created a basket full of vibrant, food-colored Easter eggs, the decorating fun continues! Beyond simply displaying them in a basket, consider these creative ideas to showcase your colorful creations:
- Easter Brunch Board Centerpiece: Incorporate your dyed eggs into a stunning Easter brunch board. Arrange them amongst cheeses, fruits, pastries, and other brunch favorites for a festive and edible centerpiece.
- Easter Egg Hunt: Hide your beautifully dyed eggs for a classic Easter egg hunt. The vibrant colors will make them easy to spot, adding to the excitement for children.
- Table Decorations: Scatter dyed eggs along your Easter dinner table as cheerful and festive decorations.
- Gifts: Share the Easter joy by gifting dyed eggs to friends and family. Package them in small baskets or boxes for a thoughtful and handmade present.
Beyond Dyeing: More Egg Decorating Ideas
Looking for even more creative ways to decorate Easter eggs? While food coloring offers endless possibilities, explore these alternative decorating techniques to add extra flair to your Easter egg creations:
- Painting: Use acrylic paints, watercolors, or even puffy paints to create intricate designs, patterns, or characters on your eggs.
- Temporary Tattoos: Apply temporary tattoos to eggs for a fun and easy way to add images and designs, especially great for kids.
- Sprinkles: Coat eggs in glue and roll them in colorful sprinkles for a textured and festive look.
- Markers: Use permanent markers or paint pens to draw detailed patterns, write names, or add personalized messages to your dyed eggs.
Happy Easter egg decorating! Embrace the creativity and joy of transforming ordinary eggs into colorful masterpieces using simple food coloring and these helpful tips.